Overview
From the main menu, navigate to System Admin > System Connector.
A System Connector allows administrators to create links between multiple Kerauno instances or other legacy IP solutions. This feature allows each integrated instance to operate independently but still act in unison. Changes or disruptions in one or more connected instances do not affect others, so that they are still accessible and able to make calls.

The System Connector works by building a 1:1 connection between systems that creates an internal SIP trunk between two servers, thus allowing extension to extension calls to users built on Kerauno via a System Connector.
Example: A business has two locations, each with their own Kerauno instance. Location A users can make direct extension calls to users at location B even though they are not using the same Kerauno instance.
Main Menu
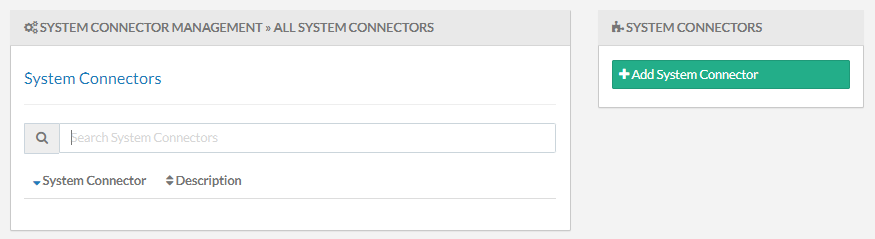
Add System Connector
Click + Add System Connector on the right side of the screen to create a new System Connector and populate the fields:
Name: Enter a name for the new System Connector. This value displays next to the System Connector on the System Connector menu and allows the connection to be easily identified.
Extension Range Min/Max: The values entered here are the minimum and maximum range of extensions of the system being connected to.
| NOTE: | Extension ranges cannot overlap with the extension range of the local system. If they do overlap, calls will always connect with a local extension. Example: The range for System A is ext. 100–150. Ranges for System B ext. 150–200. Calls from ext. 100 on System A to ext. 150 will always connect the caller to the extension 150 on System A and not System B. |
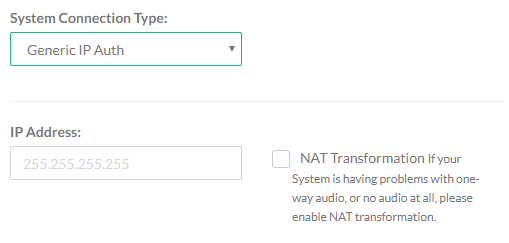
System Connection Type: Select the appropriate connection type from the available drop-down menu. When a connection type includes a password, additional fields display.
Password Required
IP Address: This field is available for all connection types. In this field, enter the public IP address of the system that is being connected to.
Username/Password: Create a secure username and password for the 1:1 connection between systems. Username and password entered here must match on the remote system. If connecting Kerauno to a different IP phone system, set up a new SIP trunk utilizing the username and password that was entered on Kerauno.
Register String: Create a registration string to pass to the remote system. The values must match between the local and remote system. Recommended length of a registration string is between 20-30 characters. Other fields can be used to build the string to remain consistent.
Use the following format:
{username}@{instance hostname or IP Address}:{Password}
Example:
Username: 321231
Password: PAssW07D
IP Address: 14.23.32.41 or xyzcorp.kerauno.io
321231@xyzcorp.kerauno.io:PAssW07D

No Password Required
IP Address: This field is available for all connection types. End the full hostname or the public IP address (if necessary) of the system that is being connected to.
NAT Transformation: This checkbox enables and disables NAT transformation. NAT transformation modifies the way the system resolves IP addresses. If you experience problems with one-way audio, or no audio at all, try enabling NAT transformation.
When all fields have been completed, click the Create System Connector button to save settings and generate the new connection.
Manage System Connectors
System Connections can be edited or deleted. Click the hyperlinked System Connector from the main menu to edit or delete.
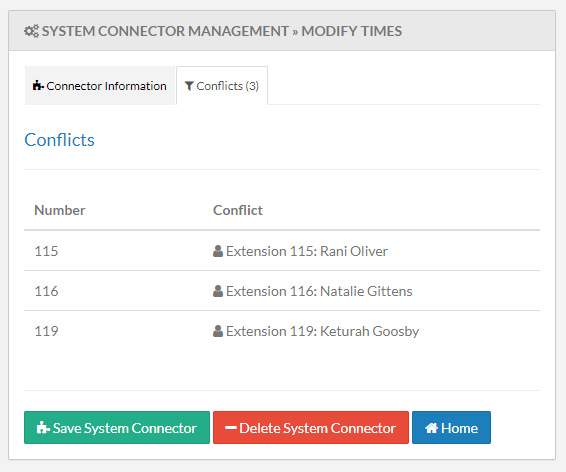
Conflicts
View predicted extension conflicts with the local Kerauno instance from the Conflicts tab within the System Connector. Conflicts occur when numbers are tied to a Call Flow, Parking Lot, or Speed Dial and must be adjusted to either Local or Remote.
Resolve conflicts by using a different extension; either Kerauno or another system. If you are unable to resolve the conflict between two connected Kerauno instances or another legacy system, choose which one takes precedence via the Migration Kit.